

Understanding the importance of document bleed
In the printing industry, bleed is defined as printing that goes beyond the edge of the paper. Full bleed typically extends an 1/8 of an inch past the edge of a document, on all four sides. Bleeds ensure professional results when the paper is cut to final trim size (meaning the artwork runs to the paper’s edge and guarantees no white margins show when the paper is trimmed to final size).
Unfortunately, many final files sent to print providers lack proper bleed – an issue that halts production while printing prepress employees fix or add additional bleed. If you want to save valuable time and forgo any extra expense, follow these steps for adding bleed to your projects:
Setting up bleed in InDesign
Most marketing and design professionals choose to create their documents in an Adobe Creative Suite program. InDesign is the preferred industry standard program that allows you to set up proper bleed at document setup.
Here are the steps to setting up full bleed in an 8.5×11 InDesign document:
- Create New Document
- Select the Print tab
- Set up the document size in your preferred unit of measurement (inches, picas, etc.)
- Remember to set up margins so text or important elements are not too close to the edge of the document (LKCS suggests a minimum of 0.25 inches (1p6 / 6.35 mm)
- Scroll down to Bleed and Slug
Bleed: Add 0.125 inches to all sides of the document. (0p9 / 3.175 mm).
Hint: if you enter just the first measurement and click on the chain icon,
all fields will populate with that measure.
Slug: Optional area for job notes and instructions (located on the pasteboard past the document and bleed areas). If necessary, add 0.5” (or 3p0 / 12.7mm) in this area.
Note: this area was not included in the screenshot below.
Note: This size will be the final trim size (inches: 8.5×11 / picas: 51p0 x 66p0 / millimeters: 215.9 x 279.4)
Reminder: Any of the above settings can be added or edited after the document is open by going to File and Document Setup.
Once you’ve made a final check of your file and are ready to create a high-resolution PDF, follow these steps to ensure your bleeds are included:
- Go to File and choose Export
- Name your file
- Save as type: Choose Adobe PDF (preferred vendor choice)
Next, choose your export Preset.
You’ll want to be certain that you choose a high-resolution preset for your final PDF,
such as one of the following: [Press Quality]; [High Quality Print], or [PDF/X-1a:2001].
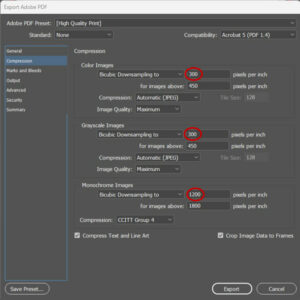
If in doubt, double check the resolution by selecting Compression. If the top numbers in each section read 300, 300 and 1200, then you’ve selected a high-resolution preset.
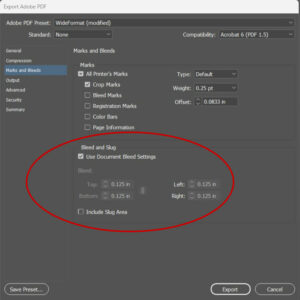
Once you choose a preset, select Marks and Bleeds. Here you can click to add printer’s marks. From a printer’s viewpoint, Crop marks are nice to include for quick visual verification that the job has bleeds. Check with your print provider to see which marks they would prefer you to include in your final PDF.
The most important step is next: click on Use Document Bleed Settings.
If bleed was added at document setup, once you click this the bleed values should automatically be added to the Top, Bottom, Inside and Outside fields. If no values are seen after selecting the Use Document Bleed Settings, then you’ll need to manually add them in the fields.
It’s important to stress that even if you set up the InDesign document up with bleeds, if bleeds are not indicated in the PDF export settings, they will not be included in the final PDF!
Setting up bleed in Microsoft Word
When you create a new document in Word, you’re not given an option to indicate bleed, like in InDesign. If you intend your Word document to print edge-to-edge, you’ll need to incorporate your bleed settings into the page size. For example, if you’re setting up an 8.5×11 document that will print edge-to-edge (no white margin), you’ll have to make some changes to the Layout in Word. Here are the steps to include bleed in your Word documents.
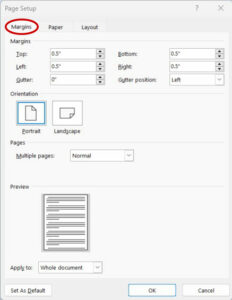
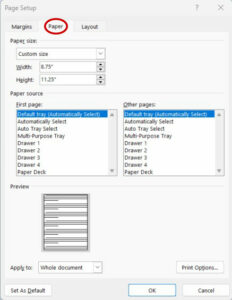
- Under Page Setup, go to Size and then More Paper Sizes.
- Under the Paper tab, type in 8.75 x 11.25 in the Paper size fields.
- Under the Margins tab, enter 0.5”
(this will allow enough cushion to cover the bleed and margin).
Note: Word does have an option to include crop marks, but they will be placed wherever your margins were established, so in this example they won’t reflect true page trim size.
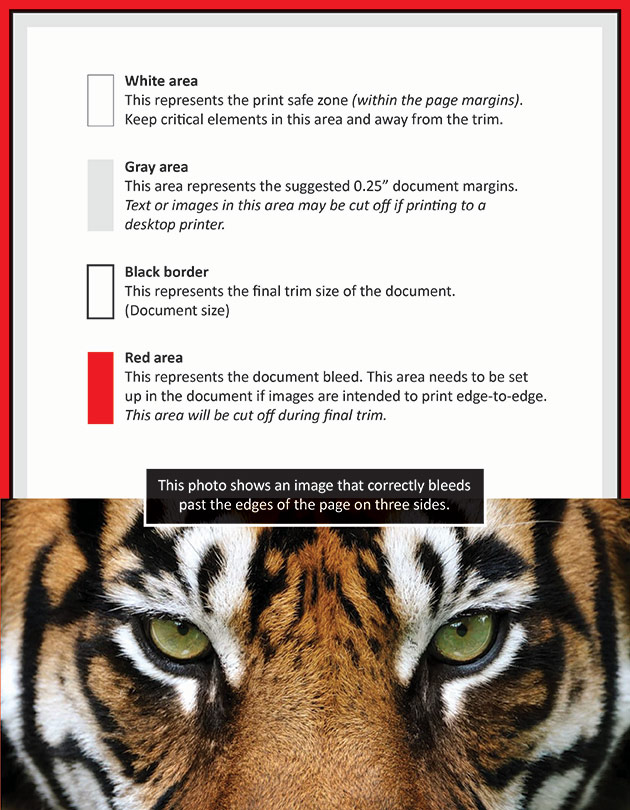
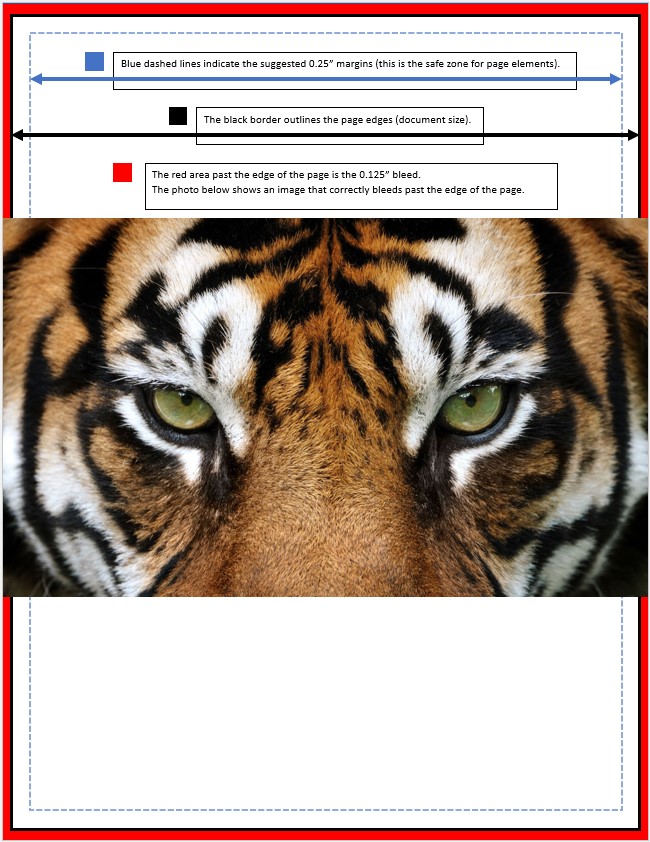
It may be helpful to view gridlines on your document to get a better understanding of where to place text blocks or graphics. The elements that touch the far edges of the paper will be within the bleed. This area will be cut off during the final trim.
It’s always a good idea to keep vital text information out of the margins to minimize the risk of something important being cut off when printed.
This example illustrates the key areas of bleed, page size, and margin within a Word document.
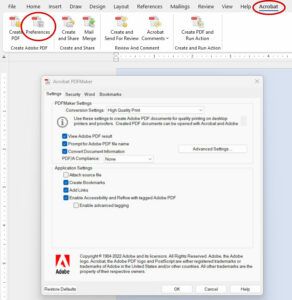
To create a high-resolution PDF with the built-in bleeds, click on Acrobat in the menu bar.
- Choose Preferences
- Select a high-resolution preset such as High Quality Print or Press Quality
- Click on Create PDF to create the final file
Final check:
Open the PDF in Acrobat and check the size. For an 8.5×11” document with full bleed,
the page size should say 8.75×11.25” (hover over the bottom left to view size or go to
File and Properties).
Did you like this blog post?
Get more posts just like this delivered twice a month to your inbox!
